Purchase Guide: Framing
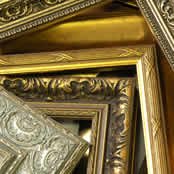 Introduction to Picture Framing
The best part about creating a piece of art is sharing it with the world. After completing your latest canvas
or developing your newest photos, it's time to spruce them up and hang them on a wall for all to see. You can't
just toss them up there naked, though—not your masterpiece! To best display your work professionally and
artistically, you're going to need a picture frame.
Basic picture framing doesn't require a whole lot of complex skills or pricey equipment. With practice, the
process of measuring, cutting mats, constructing frames, and attaching them to artwork is something that almost
anyone can learn in their basement. But with a little imagination, framing can be much more than that. Picture
frames can be works of art unto themselves! The interplay of colors and textures between your mat, picture
frame, and subject can add a whole new dimension to your creation, and the possibilities are practically
infinite for the different looks you can achieve with minor adjustments in your framing.
MisterArt.com can help you master the art of framing with materials, tools, and books
that will compliment your artwork in irresistible fashions. This guide will serve as a resource to give you
ideas on how to incorporate picture framing into your artistic vision.
History of Picture Framing
Our modern concept of framing can be traced back, unsurprisingly, to that most important era in art, the
Renaissance. The typical practice of painting on wooden panels with a gesso ground during the early Renaissance
often saw artists incorporating molding and gilded framing of the panel as an integrated part of the painting
itself. As the practice of painting on canvases instead of panels became widespread, however, the picture frame
became a separate component that was added only after the painting itself was completed. Early picture frames of
this kind were often elaborate and expensive, showing off not only the painting but the skills of the wood
carver and gilder, as well. This era of framing produced some extraordinary examples of beauty, but the picture
frames rarely reflected any of the colors or themes in paintings they were attached to.
In the late 19th through the 20th centuries, there was a movement amongst artists to return to a more
integrated approach to matching art with frame. Artists such as Van Gogh and Seurat often decorated their
picture frames in colors and styles similar to the works themselves. Other artists such as Howard Hodgkin made
picture frames a fully indivisible component of the work. Other artists simply did away with the picture frame
altogether, choosing different methods to protect and display canvases.
To learn more about the history of art and framing, you can purchase books from MisterArt.
Kinds of Picture Frames
There are nearly as many types of picture frames as there are types of art, but
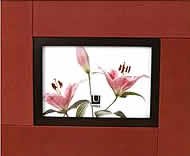
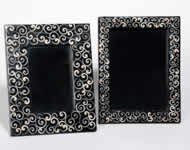
the most common picture frames fall into four different categories: wood frames, acrylic frames, aluminum and
metal frames, and clip frames. You can purchase discounted picture frames from
MisterArt here.
Wood Frames—Wood frames are the most common
kind of picture frame. Wood is a popular framing material because it is relatively cheap, versatile, and easy to
work with. Working with various paints, stains, textures, sizes, and shapes, wood frames can be made to
beautifully compliment almost any picture. You can find pre-made wood frames and
frame kits at MisterArt.com.
Acrylic Frames—Acrylic frames are excellent
because they are extremely versatile but also very durable. Although they can be very affordable, acrylic frames
are complicated to produce. It can be difficult for the average artist to make their own acrylic frames without
some sophisticated tools. MisterArt has pre-made acrylic frames in
stock in a variety of sizes.
Aluminum and Metal Frames—Aluminum
and metal frames are the most durable of all. They often look and work well in environments that other picture
frames might be unsuitable for, such as outdoors or in unusually cold or warm places. They can also be produced
featuring a distinct metallic coloring that's difficult if not impossible to achieve with other materials. You
can purchase pre-made metal frames and frame kits from
MisterArt.com.
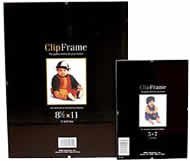
Clip Frames—Clip and corner frames are named
as such because they clamp or clip your artwork to a mat or protective sheeting. Often, clip frames are small
and unobtrusive and don't extend all the way around the edge of the artwork. They're especially ideal for
smaller works and pieces from which a larger, more substantial picture frame might distract. A variety of clip frames are available from MisterArt.
Canvas
Frames—These are deeper frames specially designed to fit on canvases, which are larger
and more difficult to frame than paper.
MisterArt.com has many framing kits in stock. These kits include everything
you need to create your own picture frames!
Matting
A mat is a thin, flat piece of paper-based material that rests within the
picture frame, typically between the artwork and the glass. In addition to keeping the glass from touching (and
potentially damaging) the artwork, matting can also serve as additional
color and decoration for your piece.
You can purchase discounted pre-cut mats from MisterArt. Many artists,
however, prefer to make their own custom mats to accent their work. Mat boards are available in an incredible
variety of colors and textures, which can make choosing the best mat for your picture or photo a mind-boggling
experience. The subtle difference between the shades "off-white" and "eggshell," for example, can make a
significant difference in the way your framed piece looks.
As general rules of thumb, neutral tones work best for black and white art and photos and are the least likely
to draw attention away from your framed piece. Nicely chosen mat colors, however, can make a picture frame
livelier and more compelling while complementing the subject. Lighter mats bring your eyes out of the picture
frame and let the colors in your artwork speak for themselves; darker mats close the artwork in and draw your
eyes' attention towards the center of the picture.
Some mat boards come in unique textures
or can be modified with tools to look rough, sleek, or antique. Other mat boards feature color patterns or can
be painted. Still other boards have inner foam cores of various colors other than the standard white. A unique
mat can enhance artwork dramatically, but can also overwhelm it. Take care and experiment with different styles
to find the best match for your picture.
Don't be afraid to mix and match—a double or triple mat can allow for more creativity in the choice of
colors and can cause several elements within the artwork to pop at once. This technique also creates more space
between the art and the glass in the frame. Layering mats can create attractive bordering effects and allow you
to blend and contrast colors just as one might do while painting. If you approach matting as an art form, your
finished, framed work will be presented with a whole new depth.
Matting board comes in a variety of sizes
and colors, so at the very least you'll need a mat knife, T-square, and ruler to accurately cut the board and to
fit your artwork. Discounted matting tools are available from
MisterArt.
Handheld Mat Cutter—Handheld mat cutters vary greatly
in shape, size, and quality. Better-quality mat cutters will often feature lines alongside the blade that make
it easier to tell where to start and stop your cut. It's very important that your mat-cutting blade is sharp so
that your mats don't have ragged edges. Spare blades are sold separately in packs, so it's a good idea to
purchase at least one pack of blades when you buy your matting materials.
T-Square and Straight Edge—Metal straight edges
are ideal for mat cutting because plastic, wood, and metal-edged rulers can be nicked or cut by your mat cutter,
resulting in crooked marks and cuts. It's convenient to use a straight edge with a non-slip backing such as cork
to help prevent sliding.
Bevel Cutter—These tools are designed to make angled
cuts to your mats. Most bevel cutters are capable of making 45- and 90-degree edges, and many can make straight
cuts, as well. Bevel cutters are perfect for showing off the inner core of your mat board.
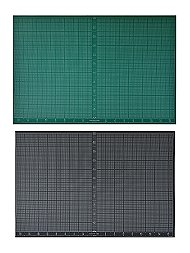
Tabletop Mat Cutter—Tabletop cutters simplify the
mat-cutting process by making the marking and measuring quicker and easier. Tabletop cutters are a good deal
more expensive than simple handheld cutters, and many cannot accommodate projects of large size. If you will be
cutting mats on a frequent basis, however, tabletop mat cutters can save you a lot of time and effort.
Mounting
Mounting artwork refers to the process of affixing your art in place
in order to display or frame it. If done correctly, the materials you use to mount your art will be hidden by
the matting and won't be visible once the framing is complete. Since a lot of mounting materials are designed to remain in physical contact with the
picture you're framing, acid-free materials can be a good choice if the artwork is valuable to you. Mounting
materials that aren't acid-free can yellow or damage your art.
There are many ways to mount a piece of art for framing. The best method for you depends largely on the size
and value of the piece you're working with. Before you decide how to mount your artwork, first consider how long
you want it to stay in the picture frame and whether or not you want to undo the framing at some point. This
section will give you an overview of common mounting materials and processes to help you make an educated
decision. You can purchase discounted mounting materials from
MisterArt.
Foam Board—Also used for
matting, foam board makes a great mounting material for framing projects. Constructed of a piece of polystyrene
sandwiched between two sheets of paper, foam board resists moisture, is acid-free, and is very light and rigid.
Simply affix your artwork to a piece of foam board the same size as your mat and press the art between the two.
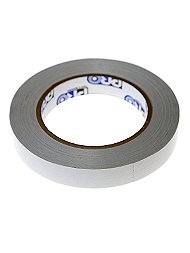
Double-sided Tape—Double-sided
tape is often used to hold matting boards to backing material and in making hinges to affix art to foam board
and other mounting materials. The tape is available in both refillable and disposable rollers in many sizes.
Adhesive Film—Double-sided film
can be used essentially to turn anything into a sticker, allowing you to easily bond your artwork with mounting
board. Some adhesive film is more permanent than other mounting methods, but most will not yellow or damage your
artwork.
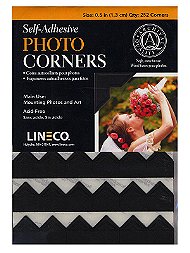
Photo
Corners—Adhesive-backed photo corners are a great way to mount artwork without any
adhesive actually coming into contact with the art. Because they're typically made for mounting photographs,
however, photo corners aren't always ideal for mounting large or heavy pieces.
Spray Adhesive—Spray adhesives
are strong and permanent. They're best for use with large, replaceable materials like posters or photographs.
Because the fumes from most spray adhesives are toxic, it's a good idea to wear a filter mask and work in a
ventilated area when using them.
Glass
Picture frames typically contain glass in order to help protect the artwork inside from dust, age, and damage.
There are all kinds of glass and glass substitutes available for the job, including single- and double-strength
glass, non-glare glass, UV-protected glass, antireflection glass, professional museum glass, shatter-resistant
acrylic glazed glass, and Plexiglas. Finding the best glass for
your framing project involves taking a close look at both your budget and the environment in which your framed
piece will be displayed.
Although pre-cut sheets of glass are available for use in picture frames, some artists like to cut their own
glass as part of the frame-making process. To do this, you'll need a glass-cutting tool and a pair of running
pliers. These tools are available at discounted prices from MisterArt.
Picture Hangers
Once you've got your picture frame, mat, and mounting all sorted out and assembled, it's time to begin
preparations to hang it on the wall! After you've found a choice spot that's perfect for your artwork, you're
ready to choose the best method for hanging your now-complete picture frame. It's a good idea to measure both
the picture frame and the wall space to make sure you get the piece straight, square, and centered in your
chosen spot.
There are a few different ways to hang a picture frame. The best method for your
piece is going to depend largely on how big and heavy your framed artwork is, but perhaps the most common method
is the use of picture wire strung between two eye screws or D-rings on the back of your picture frame. Saw tooth
hangers and frame hooks are great options for smaller, lighter picture frames. These and more picture hangers are available at discounted rates from MisterArt.
If your work calls for something a little different, though, you may want to try out other options:
Adhesives—These sticky fasteners are great for
hanging smaller, lightweight pictures. If you need to hang a picture frame without making nail holes or want to
decorate a surface such as a concrete wall where nails won't work, adhesive hangers may be your best option.
Clips—Clips can be used to hang your artwork
without a picture frame. The reusable clips grip all four corners of the piece, allowing ample room for matting,
mount boards, and glass. Most clips come in packs, typically including four to hang a single picture. Clips are
a nice alternative to framing when you don't want to distract the eye from your work itself.


