Project Sheet
Make Your Own Multimedia Greeting Card
Custom cards for a personal touch
- Difficulty Level: Intermediate
- Completion Time: 2 hours
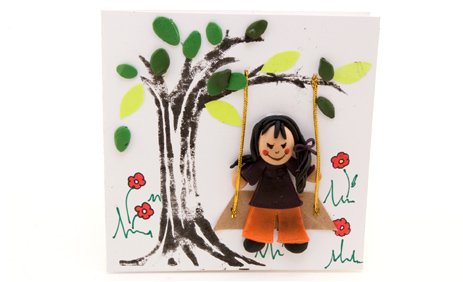 Greeting cards are great way to remind someone that you're thinking about them, but store-bought cards are typically so mass-produced and sterile. If you really want to make an impression, you best option is to create your own greeting cards! By mixing media in their creations, artists and crafters can have fun experimenting with a pleasant variety of art supplies. Experimentation is the key to inspiration!
What you'll need
Naturally, a multimedia greeting card requires a lot of media. MisterArt.com is here to help. Before we begin construction, you'll need to gather your supplies:
- Black Marker
- Black Polymer Clay
- Block Ink
- Brown Construction Paper
- Cardstock
- Craft Knife
- Cutting Mat
- Flesh-Tone Polymer Clay
- Glue
- Green Construction Paper
- Green Marker
- Green Polymer Clay
- Ink Roller
- Linoleum Block
- Linoleum Cutter
- Orange Polymer Clay
- Pencil
- Polymer Clay Roller
- Purple Polymer Clay
- Red Marker
- Thread
1. Starting out
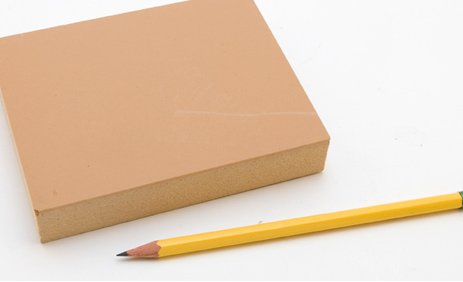 In order to create the tree our little girl will be swinging from, we must first carve the tree into the linoleum block to make a stamp. Use the pencil to draw your tree on the surface of the block. The gnarlier the better!
Remember to draw a mirror image of what you want to appear on the card, though-- that's how stamps work!
2. Woods carving
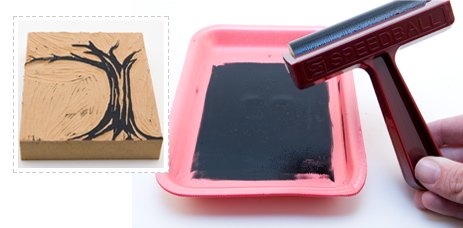
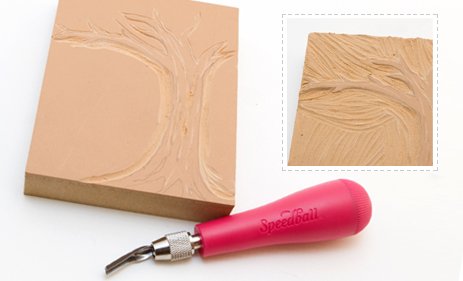 Once the tree has been drawn, it's time to cut away the figure's negative space from the linoleum block. Using the linoleum cutter, carve away every part of the block's surface that you don't want to touch the card's cover. The easiest way to go about doing this is to carve around the tree's outline first and then remove the rest of the block's surface. Don't forget to carve a few gnarls out of the tree trunk!
3. Roll out
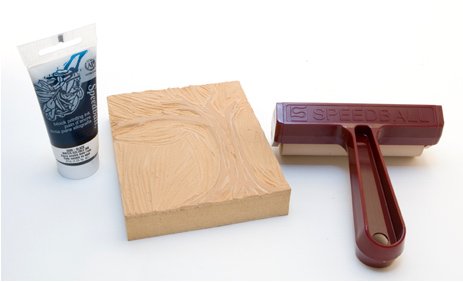 With the linoleum carved, it's time to apply ink to the stamp. Pour the block ink on to a tray and roll the ink roller through the ink until the roller's surface is covered evenly. Next, roll the ink evenly on to the carved side of the linoleum block.
4. Under pressure
Once the block has been inked, place the carved side down on to some scrap paper and apply an even amount of pressure across the back of the block. By practicing with the stamp on scrap paper, you can determine if any stray ridges need to be carved off of the block so that they don't transfer ink to the card. Once you're satisfied that only the tree will transfer ink to paper, re-apply ink to the stamp and press it down on to the cover of the greeting card.
5. Leave us
Next, use the polymer clay roller to roll out a thin sheet of green polymer clay. From this sheet, carve out or sculpt numerous green leaves. These leaves will give our tree a colorful 3-D look. Using the craft knife, carve a few leafy veins into the clay.
6. It's a girl
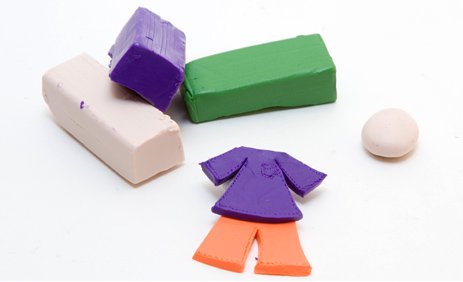 Finally it's time to sculpt our swinging gal. Roll out the orange clay and cut out her pants, removing the excess clay. Using the craft knife, carve tiny markings that resemble stitching along her pants cuffs and pocket areas.
Next, roll out the purple clay and cut out a shape for her blouse, removing the excess clay. Make sure the sleeves point outwards-- her hands will be grasping the swing ropes at her sides. Place the blouse over the top edge of the pants and press, causing them to stick together.
Now roll a round head shape out of the flesh-tone clay and stick it on to the top of the blouse. Roll two oval hand shapes and stick them under the ends of the sleeves. Using the craft knife, replicate stitching along the neckline, cuffs, and bottom of the blouse.
To create hair, roll the black polymer clay into very thin tendrils. Twist three thin tendrils together for each side of her head to make ponytails and press them on to her head. Add two or three short lengths of clay to create bangs on her forehead. Role a thin tendril of purple clay to sculpt a bow and attach it to our girl's new hair.
Finally, roll two oval shapes out of the black clay to make shoes. Attach them to the underside of her pants cuffs.
7. Get fired up
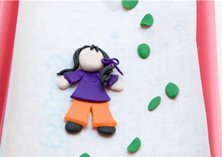 With our figure complete, it's time to fire her in a polymer clay oven or a toaster oven. Set the temperature at 275 degrees and bake the clay girl and leaves for 10-15 minutes. Be careful not to over-bake the clay, as it will discolor. Smoke can also blacken the clay, so make sure your oven is clean before firing.
Once the clay has been fired, let it cool down completely.
8. Have a seat
While waiting for the clay to cool, sketch out a swing seat on the brown construction paper. It should be slightly wider than the girl's outstretched arms. Remember to draw a trapezoidal shape in order to convey perspective properly. Using the craft knife, cut out your swing and remove the excess paper. If you're into details, use the pencil to draw a wood grain on to the swing.
9. Face time
Now that our clay figure has cooled off, it's time to add a face. Use a fine-tipped black marker or pen to draw closed eyelashes, a nose, and a smile on the figure's head. Use the red marker to add rosy cheeks to the corners of her smile.
10. Time to leave
Using the craft knife, cut out several leaf shapes from the green construction paper. Then use the glue to attach all of the paper and clay leaves we've created on to the tree limbs. Don't be afraid to overlap them a bit.
11. Drawing to a close
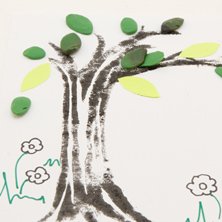 Next, use the green and red markers to draw lush grass and bright flowers on the ground around the tree. If your branches are still looking a bit skimpy, you can draw a few more leaves, too.
12. An adhesive end
 First, glue the swing on to the card's cover. Next, glue our gal on to the cover so that she appears to be sitting on the floating swing. Now use the craft knife to cut two lengths of thread long enough to stretch from the tree branch down over our girl's hands and to the middle of the swing. Glue the thread to the branch, the figure's hands, and to the swing.
We're done! Celebrate by giving this handmade card to someone special.
More Project Sheets

Glow-in-the-Dark Mirror
- Difficulty Level: Beginner-Intermediate
- Completion Time: 2 Hours

Tools Silhouette Sign for Dad
- Difficulty Level: Beginner-Intermediate
- Completion Time: 1-2 Days

DIY Acrylic Pour Bracelet
- Difficulty Level: Beginner
- Completion Time: 2-3 Days

DIY Mason Jar Planter
- Difficulty Level: Advanced
- Completion Time: 2-3 Days

Marbled Ornament
- Difficulty Level: Beginner
- Completion Time: 1-2 hours

Clay Pumpkin Jar
- Difficulty Level: Beginner
- Completion Time: 1-2 hours

Pro Glow Tape Skull
- Difficulty Level: Beginner
- Completion Time: 1 hour

Personalized Pencil Pouch
- Difficulty Level: Beginner
- Completion Time: 1 hour (plus drying time)

Decorate Your Own Birdhouse
- Difficulty Level: Beginner
- Completion Time: 2-4 hours

Transparent Photo with High Gloss
- Difficulty Level: Beginner
- Completion Time: 1.5 hours

Sketching with Graphite Putty
- Difficulty Level: Beginner
- Completion Time: 8 hours

Scratch Art with Color Accents
- Difficulty Level: Beginner/Intermediate
- Completion Time: 1-3 hours

Polymer Clay Fairy House
- Difficulty Level: Intermediate
- Completion Time: ~8 hours

Experiment with Resin Casting
- Difficulty Level: Beginner/Intermediate
- Completion Time: 1-2 hours (pre-cure)

Color-Splash Vision Board
- Difficulty Level: Beginner
- Completion Time: 3-4 hours

Etched Glass Holiday Gift Jar
- Difficulty Level: Beginner/Intermediate
- Completion Time: 1 hour

Create a colorful reminder of the good things in life
- Difficulty Level: Beginner/Intermediate
- Completion Time: 1 hour

Face Painting with Custom Stencils
- Difficulty Level: Beginner/Intermediate
- Completion Time: 1 hour

Art Deco Pendant with Polymer Clay
- Difficulty Level: Beginner
- Completion Time: 1 hour

Transfer Designs with Lazertran
- Difficulty Level: Beginner
- Completion Time: 15-20 minutes

Multimedia Painting with PanPastels
- Difficulty Level: Beginner/Intermediate
- Completion Time: 1-2 hours

Special Effects with Brusho Colors
- Difficulty Level: Beginner/Intermediate
- Completion Time: 1-2 hours

Make Your Own Paper Quilling Frame
- Difficulty Level: Beginner/Intermediate
- Completion Time: 10 hours

Make Your Own Greeting Cards
- Difficulty Level: Beginner
- Completion Time: 10-30 Minutes

Make Your Own Autumn Leaves Stained-Glass
- Difficulty Level: Beginner/Intermediate
- Completion Time: 1-2 hours

Make Your Own Magnetic Alien Message Board
- Difficulty Level: Beginner
- Completion Time: 2 hours

Make Your Own Compact Disc Drink Coasters
- Difficulty Level: Beginner
- Completion Time: 2 hours

Make Your Own Crayon Candles
- Difficulty Level: Intermediate
- Completion Time: 4 hours

Make Your Own Kite
- Difficulty Level: Intermediate
- Completion Time: 3 hours

Make Your Own Masquerade Ball Masks
- Difficulty Level: Intermediate
- Completion Time: 2.5 hours

Make Your Own Multimedia Greeting Card
- Difficulty Level: Intermediate
- Completion Time: 2 hours

Make Your Own Bouquet of Photo Flowers
- Difficulty Level: Beginner
- Completion Time: 1 hours

Make Your Own Rock Zoo
- Difficulty Level: Beginner
- Completion Time: 2 hours

Make You Own Custom Sketchbook
- Difficulty Level: Intermediate
- Completion Time: 2 hours

Make Your Own Stained Glass Window
- Difficulty Level: Beginner
- Completion Time: 2 hours

Make Your Own Oil Painting T-Shirt
- Difficulty Level: Intermediate
- Completion Time: 24 hours

Make Your Own Paper Mache Bowl
- Difficulty Level: Intermediate
- Completion Time: 24 hours


